On the downloads page are links to some example applications relating to a number of posts on this blog. In this, the first of 2 posts on git I will explain how to create a repository on the Github site.
1. If you haven’t registered with the site go to the Github home page and do that now.
2. Once you have registered make sure you are logged in.
3. Click on the + in the top right of the page and select New Repository from the popup

4. On the new repository page enter a name for the repository and if you desire a description. Do not use spaces in the name, use hyphens ‘-‘ instead.

5. Select either a public or a private repository. At this time a free account is limited to public repositories which are visible to everyone. A paid account allows you to create private repositories. In either case the repository owner and contributors are the only people able to update or modify the repository.

6. It is recommended you add a README file, tick the Initialze this repository with a README box. We will edit the contents of this file later.

7. There are a number of license options. Click on the information icon (i) for details, different licenses define what you and those downloading the repository contents are responsible for. I generally go for The Unlicense license as it states the information is offered under public domain and that I cannot be held liable and the recipients are not responsible for any type of recognition or copyright restrictions.

8. Once all the options have been completed above click the Create repository button

All done! a repository will now be created, you will be presented with a page like this. Depending on the options selected previously you may have fewer, even no files listed.
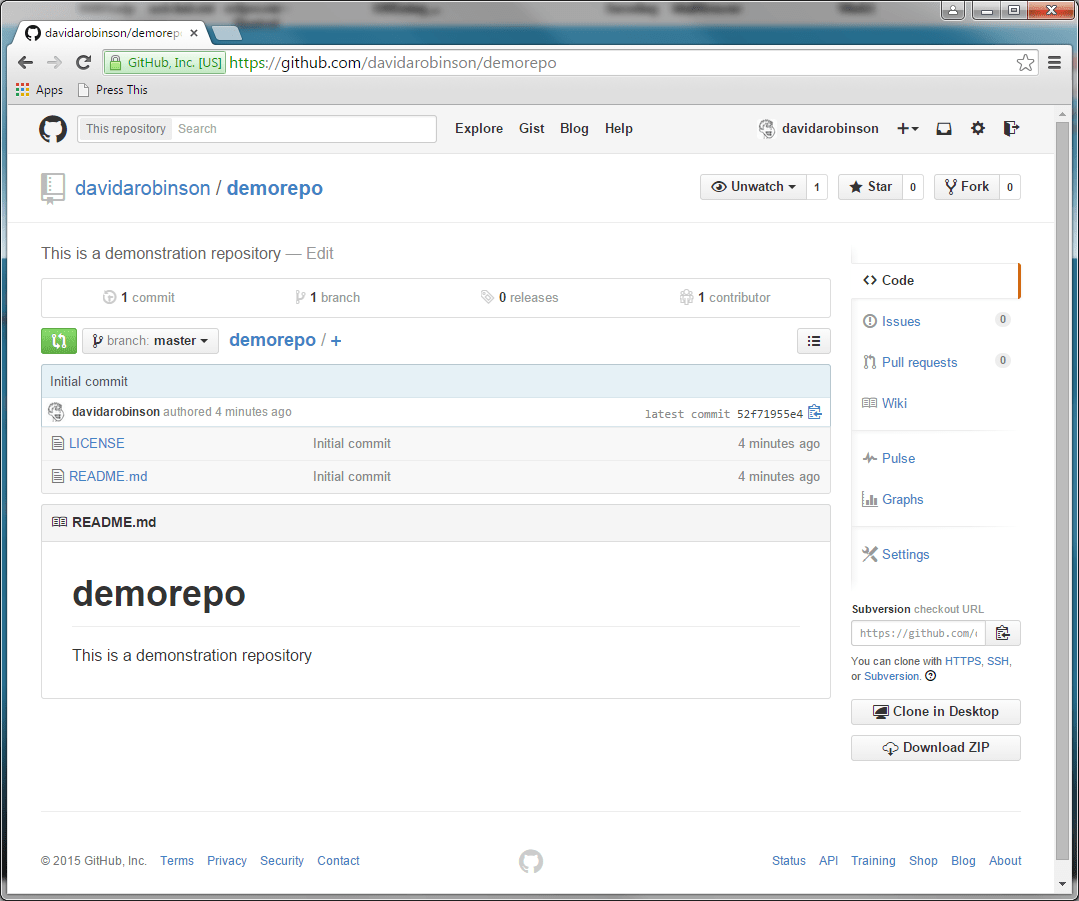
Just to complete this example lets modify a file and commit the change back to the repository.
1. Click README.md link in the list of files.
2. When the file is displayed click the pencil icon in the header.

3. In the file editor modify the file.

4. When you have finished editing click the Preview changes tab. Green bars highlight where the changes were made.
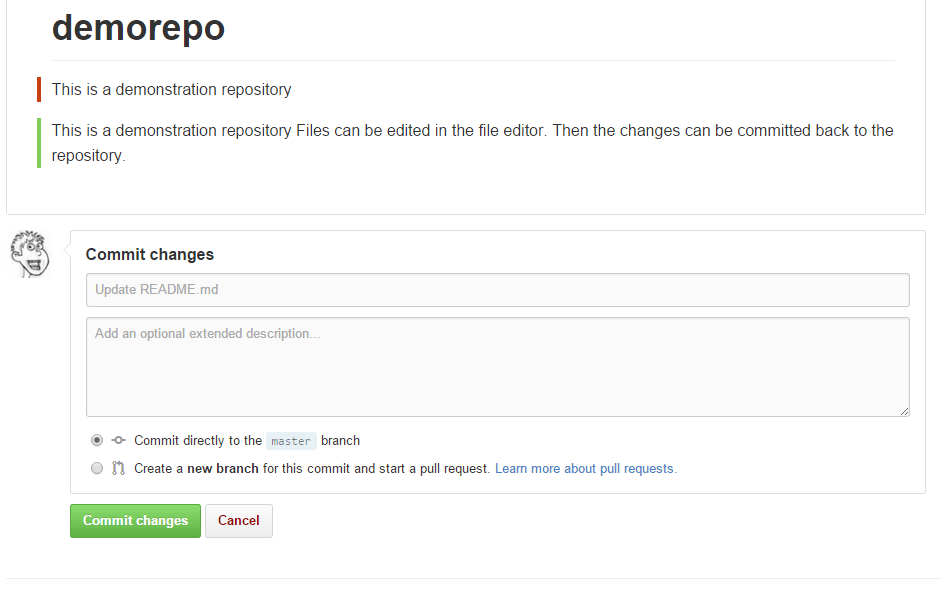
5. At the bottom of the page in the Commit changes section it is good practice to enter an brief explanation of what changes are being committed. A longer extended description is optional.
6. Click the Commit changes button. The repository is now updated with the changes made to the readme.md file.
In the second part we will be looking at using the command line to create a local repository, link this to the Github repository and and commit files up to Github.
