The following steps describe how to create a new repository in Visual SVN (SVN) and set it up as a working folder for your project code. There may be alternative ways to perform some of these steps but this is the way I was taught and it has always worked for me.
Step 1: Create a new repository in VisualSVN (right click) Repositories > Create New Repository

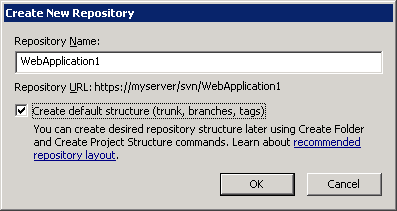
Step 2: Specify the name of the new repository in the ‘Create New Repository’ dialog. Ensure to tick the checkbox if you want the repository to contain the default folder structure (trunk, branches and tags) and I strongly recommend you do. In this case the trunk folder will be the main folder containing the code.
Be sure to make a note of the Repository URL, you will need it later.

Click OK and you now have an empty code repository in SVN.
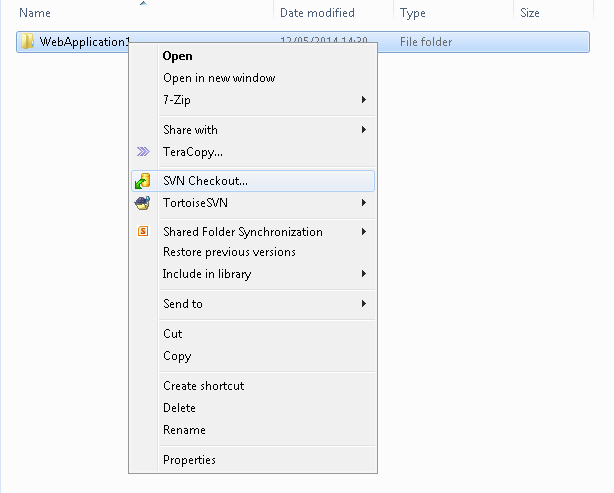
Step 3: The next step is to set up a working folder on a local drive. This can be an existing folder containing code for an existing project, or if this is to be a new project a new empty folder. In this example I am using an existing project.
Right-click the working folder and select SVN Checkout from the context menu.

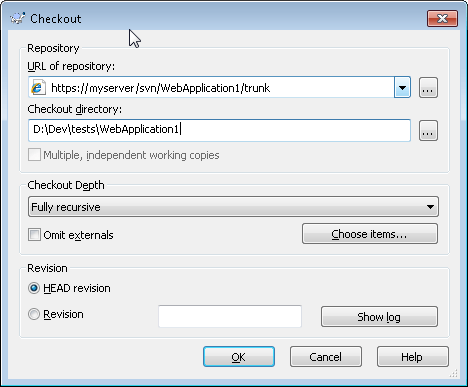
Step 4: In the checkout dialog specify the URL of the repository which you made a note of earlier.
The Checkout directory will prepopulate with the location of the folder you right-clicked on.

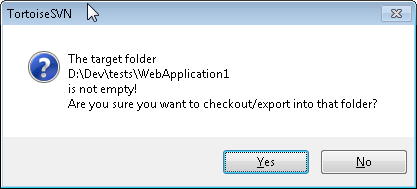
Step 5: After clicking the OK button this dialog will be displayed if the working folder is not empty and already contains project code. Because we know the SVN repository is empty it is safe to click the Yes button which is what you want to do on this occasion.
If the working folder was empty skip to step 6.
Note: If the SVN repository was not empty and the working folder was not empty you do not want to checkout to the folder as you will potentially end up with mixed projects in the same folder.

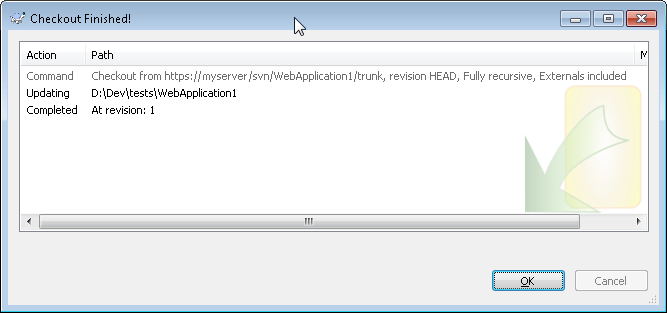
Step 6: The Checkout Finished dialog confirms a working folder has been linked to the SVN repository. Click OK.

Step 7: Going back to Windows Explorer you will see the folder now has a green icon (known as an icon overlay). There are a number of icon overlays describing different states. The green circle with a tick indicates that the working folder is up to date and in sync with the SVN repository.

Step 8: If the working folder already contained files and subfolders they will not yet have an icon overlay because we have only set up and linked the working folder with SVN not any of it’s contents that already existed, as they did in my case.
As files and folders are added to the working folder they will not be added to the SVN repository automatically, so they too will not have an icon overlay initially.
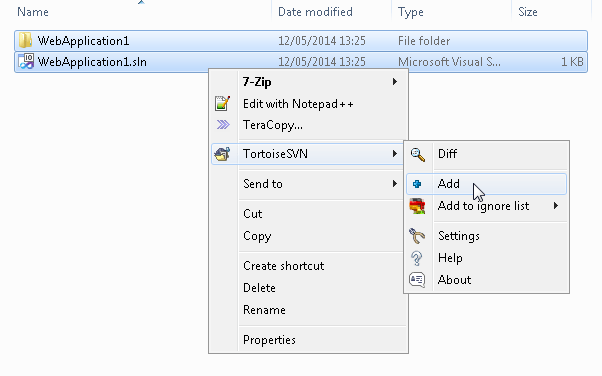
We need to explicitly tell SVN to include the sub files and folders in the repository. Select all the working folder contents, right-click the selection and select TortoiseSVN > Add from the context menu.
[Every time files or folders are created these steps can be repeated to add them to the SVN repository.]

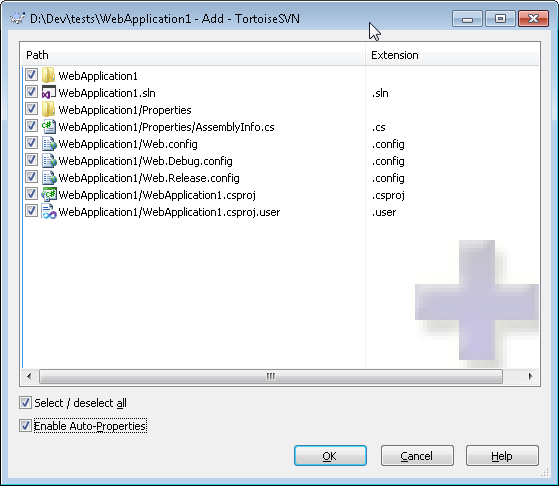
Step 9: The Add dialog is displayed with the folder contents listed. Un-tick the checkboxes for the items not to be added to the SVN repository, then click OK. It is common practise to exclude bin and obj folders containing compiled assemblies, solution user options (.suo) and project user files (csproj.user) to name a few.

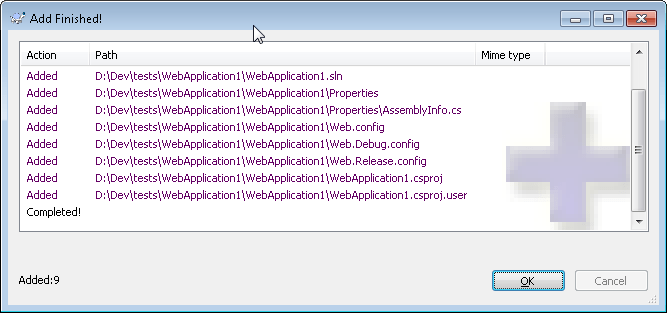
Step 10: Once the OK button is clicked on the Add dialog a new dialog is displayed confirming the contents have been added.

Step 11: We are nearly there. The files and folders added will now have an icon overlay indicating the fact they have been marked for inclusion in SVN, they have not yet been physically added to the SVN repository . As in the image below this is usually represented by a blue cross.

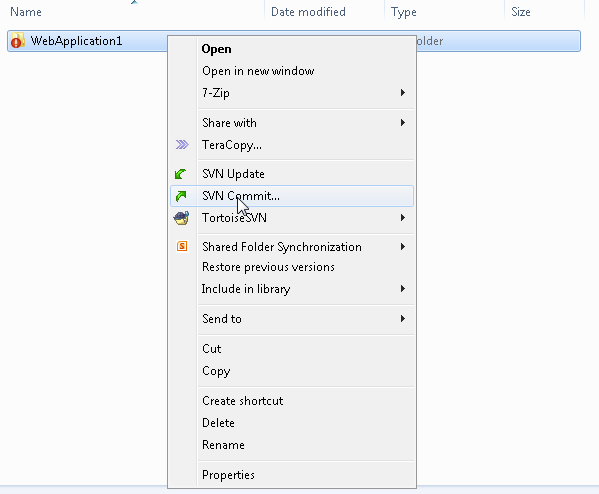
Step 12: To physically add the added items to the SVN repository we need to Commit the changes by returning to the parent working folder, right-clicking on the working folder and select SVN Commit from the context menu.

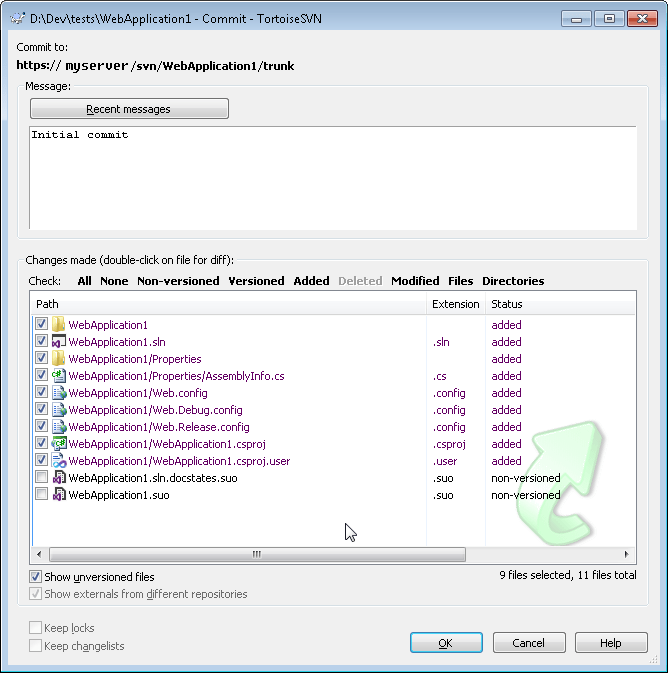
Step 13: The Commit dialog will be displayed. As this is the initial commit check the path you will commit to.
Always add a meaningful message. As this is a new project the text ‘Initial Commit’ is sufficient. If you have been working on an existing project, make the message relevant to the changes being committed. e.g. “Added Logging for person class”. Add multiple messages for multiple changes. Alternatively if there are multiple changes to commit, write the message for each change and only select the files relevant to the change, then repeat for the next change and so on.

Step 14: After the OK button is clicked on the Commit dialog the list of files committed will be confirmed in the Commit Finished dialog.

That, as they say, is that.
The Add and Commit actions can be performed as and when required during development.


You must be logged in to post a comment.