Using the upload control in an ASP.NET MVC 4 application is quite straight forward, though there are a couple of gotchas that can catch you out.
In the example below an image can be selected and uploaded to the Uploads folder on the site. The image is then displayed in the page on post back. At this point there is no validation on the type of files being uploaded so anything file other than a valid image file will cause the application to error. Validation will be discussed at a later time.
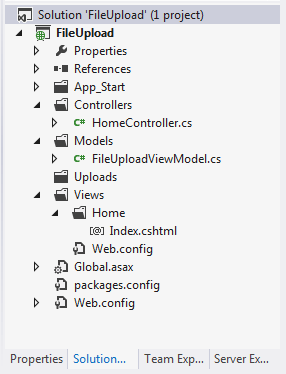
This is how my solution looks in Visual Studio
1. View Model (FileUploadViewModel.cs)
The view model has 2 properties. The UploadFilePath property will hold the path of the file to be uploaded. The Url property will hold the relative Url for displaying the image on the page.
using System.ComponentModel.DataAnnotations;
using System.Web;

namespace FileUpload.Models
{
    public class FileUploadViewModel
    {
        [Display(Name="File To Upload")]
        [Required]
        public HttpPostedFileBase UploadFilePath { get; set; }

        public string Url { get; set; }
    }
}
2. The Controller (HomeController.cs)
When a file is selected and submitted the HttpPost Index method checks the model is valid, i.e. a file has been chosen. If a file has been chosen the file is saved in the Uploads folder and the relative Url is populated in the Url property.
using FileUpload.Models;
using System.IO;
using System.Web.Mvc;

namespace FileUpload.Controllers
{
    public class HomeController : Controller
    {
        public ActionResult Index()
        {
            return View(new FileUploadViewModel());
        }

        [HttpPost]
        [ValidateAntiForgeryToken]
        public ActionResult Index(FileUploadViewModel model)
        {
            if (!ModelState.IsValid)
            {
                return View(model);
            }

            var fileName = Path.GetFileName(model.UploadFilePath.FileName);
            var uploadPath = Path.Combine(Server.MapPath("~/uploads/"), fileName);
            model.UploadFilePath.SaveAs(uploadPath);

            model.Url = Path.Combine("/uploads/", fileName);

            return View(model);
        }
    }
}
3. The View (Index.cshtml)
The view displays a ‘file’ type of input control.
One of the things that can catch you out is the form encryption type. Note how it is set to “multipart/form-data”, without this it will not work because your model will be invalid.
@model FileUpload.Models.FileUploadViewModel
@{
    ViewBag.Title = "Index";
}

<h2>Index</h2>

@using (Html.BeginForm("index", "home", FormMethod.Post, new { enctype = "multipart/form-data" }))
{
     @Html.AntiForgeryToken()
     @Html.ValidationSummary()
    <fieldset>
        <legend>
                <strong>Files</strong>
        </legend>

        <p>
            @Html.LabelFor(m => m.UploadFilePath)<br />
            <input type="file" id="UploadFilePath" name="UploadFilePath"/>
            <br />
            <input type="submit" value="Upload File"/>
        </p>
        <img src="@Model.Url" alt="Uploaded Image"/>
    </fieldset>
}
If no file is selected when the form is submitted the standard Required Field validation message will display ‘The FieldDisplayName is required’ which in this case is exactly ‘The File To Upload field is required’. Which is the same message displayed when the form encryption type is not set.
This is what is displayed when the application is initially running

…and when an image file is uploaded

How Can This Be Enhanced Further?
We could
- Add validation to limit file types
- Have the upload locations configurable, different file types could be saved in different locations

Reblogged this on Dinesh Ram Kali..
Thanks for the repost.